
How to Plan Your Thru-Hike on the John Muir Trail
Quick tips for a sick trip down the JMT!

The John Muir Trail is 211 miles starting from Yosemite Valley and ending on the summit of Mt. Whitney traveling through the Sierra. There are many ways to hike this trail whether south bound, north bound, section hiking, entering or exiting on different points, your daily distance or what else have you. This can make it challenging when trying to locate correct and accurate information for planning. Keep in mind everyone does it differently and all the answers won't be here but, this is the information I can give you on what and how we hiked the John Muir Trail and some things we learned before and while on trail. I'll do my best to keep the information in chronological order to keep sense of everything. I will be referring to this as if you were hiking the JMT form the northern terminus (Yosemite) southbound to Whitney. Most people hike SoBo but it can be hiked NoBo, it is just a harder start out the gate since the highest peaks will be first to conquer.

PREPARING FOR THE JOHN MUIR TRAIL!
Permits
First and foremost, in order to hike the JMT you will be required to obtain a permit. The parks department limits the amount of people per day on the trail to 40-60 people. The best way to obtain your permit is to fax in your forms to be entered into their lottery. Some people get their permits on the first try, other people have had to wait 1-2 years before they got their permit so make sure to get your reservation forms in the second the lottery opens - 24 weeks in advance in September to November. Here is the link for the lottery information from the northern terminus.
Once you get your permit, start training. The JMT's elevation gain is slightly over 45,000 feet for the entire trail… Mt. Everest comes in at 29,000 feet. It's a lot of up and down so get your legs conditioned. They say the grade of the trails does not go over 6% but the Golden Staircase will make you question this fact.

Resupplies
About two months beforehand (this is more than enough time) you will need to ship your resupplies out. Plastic 5 gallon buckets are perfect and preferred for this as most places recommend using them. Resupplies are all dependent on how quickly and long you will be hiking the trial so be sure to prepare properly so you reach your resupplies at the correct time. Simply just plot out how many miles per day you wish to do and reference the map to know your days to get to your resupply. There are several resupply points along the trail as well as hiking out to a town for an additional place to resupply. Each resupply point along the JMT runs on different schedules and costs for shipping food so be sure to double check when they open and close to make sure your package will arrive and be there for you. Also, each place has either bear boxes or bins filled with other peoples food/gear that they chose to leave behind during their resupply. You might find some great stuff in there like batteries, trail bars or full blown meals or leave stuff behind for the next person.

Resupplies on the Trail
First after Yosemite is Red's Meadow by Devils Postpile, next is Muir Trail Ranch (MTR) which is close to the halfway point on the JMT and last is Vermillion Valley Resorts (VVR), you'll need to take a ferry across the lake if you don't want to hike the 5-7 additional miles (one way).
Red's Meadow was great, they have a little thru hikers campsite in their campground as well as a great dinning spot and store for gas and supplies besides your resupply. The communal campsites last year were sites 38 A, B and C. Everyone pitches in for the night to keep cost down but they never came around the night we were there. The cost for shipping your package here was $40.00 + shipping. Go to the top of Devil's Postpile for dinner! Here is the link to the PDF for your shipment to Red’s. Follow their instructions and everything will be fine.

MTR, MTR, MTR… MTR is the worst, hands down. We read about them not enjoying thru hikers but it was made apparent the second we walked in...literally. Very rude and they want you to get out as fast as you came in. It also cost $80.00 + shipping to get your resupply packed in here. I would not recommend shipping your food here and plan to ship your resupply to VVR as we heard from many people it is way cooler there. MTR is a privately owned ranch but there is camping just outside the ranch. You will need to ford a river to get there but there also is a hot spring there so if you do stay at MTR for the night its definitely worth fording the river to soak your bones. If you choose to ship your resupply to MTR here is the link. Again, I do not recommend this spot. We chose this because it lined up with our specific planning…. and was $70.00 to ship last year.
We never made it to VVR due to our planning so I can not speak to what it is like or how much it costs. We heard from a lot of other thru-hikers that is was a great place to resupply. Really nice people and good vibes. Be sure to have some cash for the boat ride if you should take it and be prepared to wait for long periods to also take that ferry since they can only take small groups one at a time. Here is the link for VVR.

Our last resupply was in Independence, CA. We had to hike out from Rae Lakes over Kearsarge Pass and hitch a ride into town when we got to the Onion Valley parking lot. We were having some technical difficulties with gear and needed to make moves to try and arrange replacements in town. We shipped our buckets to the local USPS office in town. It costs about $15.00 to ship there, just make sure to write ‘Hold until (date you're picking up)’ on your 5 gallon bucket. The USPS when you ship it out will help you with this. The USPS in Independence had my partners resupply bucket but did not have my package. They mentioned that they must have gave my bucket away as he threw his hands up in the air with a clueless look on his face. There are also a couple other places to ship your resupply in this town (The Courthouse Motel and the Mount Williamson Motel). If it wasn't for a fellow thru hiker we would not have found this package. Due to his creative thinking he knew the post office said they received it but didn't have it so we went to the other places to see if we could locate it. Sure enough somehow it grew legs and went to Mt. Williamson Motel. The lady here (Strider) is super nice and also will hike your resupply up Onion Valley to Kearsarge Pass for you if you prefer that treatment. Dependent on when you hike the trail this town might be packed. It's on Highway 395 and has a population of 600 so its not too big and when hiking season is in effect it might be hard to find a bed. When we came down from Onion Valley we checked every place and they were all booked. The last place we asked, The Courthouse Motel, we got extremely lucky after chatting with Alex and his brother (who work there). They turned us away form there at first since they had no vacancy and told us about a campground a mile up the road back towards Onion Valley. We took off in the night to go to the campground and right as we were about to walk into the campground, Alex and his brother cruised up and told us we could crash in their bunk house. We stayed with them for a couple days while we resupplied and waited for our significant others to arrive. We got really lucky on how everything in Independence worked out. That town will always hold a little spot in my heart for everything working out so well.
Here are the links for options of resupplying in Independence, CA.
https://planyourhike.com/planning/resupply-points/the-courthouse-motel/
http://mtwilliamsonmotel.com/resupply/
http://www.uspspostoffices.com/ca/independence/independence


Vehicles and Transportation
If you have awesome friends and significant others that live in or close to CA you do not need to worry about car situations as they can drop you off in Yosemite and pick you up at Whitney Portal/Lone Pine. This happened to work well for us since it was one last thing we did not have to worry about. If you do not have this option there is long term parking in Yosemite at Happy Isles, and if you have a second vehicle you can check the parking conditions at Whitney Portal. They were repaving the roads at Whitney Portal last year (2016) so no cars were able to park there. For more information on parking, buses to get you back to your vehicle if your rolling solo and flights to CA if your coming from out of state, check out Kristen Bor’s write up. She has an extremely detailed post on her site.

Packing and Gear
Check out my Kit for my full rundown of gear recommendations, but here are a few more tips and general gear to bring and packing up.
Toiletries
Your typical toiletries, tooth brush, tooth paste, floss, bring a couple plastic bags for your tp and pack it out. You’d be surprised at how many people just put a rock on tp and leave it. Don’t bring deodorant or soap or anything like that. You do not need it and it will take up space and weight. Just my opinion though.
Photography
I took my Tenba ICU(Internal Compartment Unit) which held my Nikon D810, Nikkor 14-24mm, Nikkor 24-70mm, Nikkor 70-200mm, Lee Neutral Density Filter kit, Nikon polarizer, about 20 SanDisk SD cards - 32 &64GB, a rocket air blower, and about 6 Nikon batteries. I also took a small lightweight Manfrotto BeFree Aluminum Travel Tripod with Ball Head. One of the best products I had was a Peak Design Capture Pro Clip. If you are a photographer or want your camera always readily available I highly recommend this product!
Food
You need as many calories as you can get. Dependent on how fast and far you move you will be burning between 5-6,000 calories a day.
Breakfast and dinner: We took freeze dried meals from Mountain House for breakfast and dinner. If you are splitting those meals between your partner and yourself I would not recommend this option. If you were to just take them for you, you will be good. If I was to do it again, I would make my own meals since you can really pack in more calories than those have. We also stopped by Taco Bell and BK lounge to grab handfuls of hot sauces and salt and pepper packets. Another nice thing to have was miso soup, good for a appetizer to warm you up and they have a lot of sodium and salt to put back in your body. We also ended up trading in some of our breakfasts on our last resupply after talking with some PCT thru hikers. They told us that they started grabbing honey buns, coffee cakes and other pastries since they are loaded with calories and it was nice to change it up.
Lunch: We had a wide array of food ranging from nuts, tortillas, tuna packets, trail mix, bars, jerky, dried fruit, snickers (loaded with calories and good to barter with), cheese, meat sticks, chews, gels, peanut butter, candy, etc.
Last but not least, drinks: Tea (forgot the coffee), hot chocolate, Nuun tablets and powdered electrolytes mixes, e-mergency (these were awesome at night after hiking because of the supplements and it was carbonated).
A few other pieces that I recommend bringing:
- Pen and journal - good to keep a log of what you did and what happened along the way
- The 10 hiking essentials
- Book for reading (check out these adventure reads)
- Hand sanitizer
Packing You Pack
This may be understood by many, but for people not versed in backpacking long distances, properly packing and distributing weight is a key ingredient to having a much more comfortable and enjoyable time on the trail. I like to think of packing my pack in tetris layers, using similar weighted items so you can distribute the weight properly. Try to keep the heavier items in the center of your pack or middle of your back. Same goes with my pack list, I will start packing from the bottom of my pack up to the top lid then move to the outside pockets.
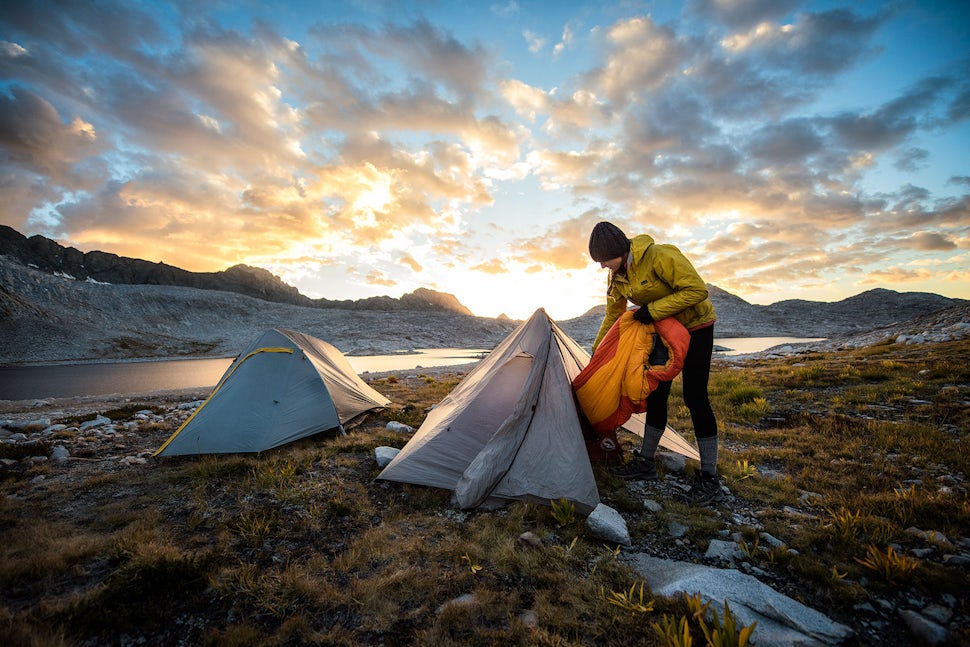
Bottom Layer: I put my sleeping bag in the bottom of my Osprey pack. The bag is specifically designed for bottom access to your sleeping bag. I strapped my tent on the outside bottom part of my bag where there are straps built for this. This helped keep the bag upright while packing.
Second Layer: From there I will compress my Sea to Summit dry bag with all my cloths (not including jackets - these will be padding to fill in the gaps closer to the top of the bag) in it and put it to one side on top of my sleeping bag. I place my MSR Reactor with gas and burner inside and next to the Sea to Summit bag which created a good second layer for the next gear. These two parts (stove and bag) weigh similar so it’s even across the width of the bag.
Third Layer: I placed my Goal Zero Nomad 20 solar panel down for a flat surface if I was not using it.
Fourth Layer: I then packed my Bear Vault laying horizontal and the Sherpa 100 next to it which fit the width of the bag well. Now comes the padding of the jackets, specifically the two puffies mentioned earlier. I packed my jackets in the dead space that was created from the Bear Vault which also allowed for quicker access to the jackets then digging through your entire pack.
Fifth Layer: From there I placed my Tenba ICU/ camera gear on top of the Bear Vault which brings us up to the drawstring to the top of the inside of my pack.
Top Lids: Stay with me here… My bottom level bigger top lid carried all my small stuff like headlamps and what not. I have a small Patagonia draw string bag that holds my compass, headlamps, chopsticks, multi tool, lighter, some string and any other small stuff. I place that inside my wooden bowl which is next to my Crown Royal bag which holds my camera remote trigger and batteries for headlamps. I put my beanie(or hat whichever I was wearing) in the bottom lid as well. My smaller top lid carried my toiletries and tp as well as the maps.
The outside of the pack: The outside of the Xenith pack has two long zippered lateral pockets on either side of the front of the bag. I stored my trekking poled in one side when I was not using them and my coffee cup which had my flies, forceps and fishing material in a bag that fit well inside my coffee cup in the other side pocket. I also put a bandana and a third dry bag in thesis pockets.
The very outer mesh pocket on the front of my Osprey bag held my MSR Micro Filter which aired quickly here after use and my towel if wet.
The side mesh pockets held my Platypus Hoser 2liter (keep it opposite of where you put your Peak Design Capture Pro Clip so the hose and camera are not competing for space) and the other mesh side pocket held my tripod and fly rod.
You will find your own method since different gear will be used and the size of our bags will differ but try doing a couple practice runs at packing your gear to make sure you have properly distributed the weight for optimum comfort when your on the trail.
PLANNING YOUR HIKE!
This is the best section because I can only offer my suggestions paired with some of our experiences on the trail, leaving a lot of the fun and unknown up to you to figure out. No worries if you do not have it all planned before the trip. It will all work its self out when your on the trail.

So now that the tasks of permits, resupplies and transportation are planned out now comes the stage of planning out your hike. This all depends on your timing and how fast or slow you move. The typical pace to hike the JMT is 21 days but I will say this about that: take your time. It's way more enjoyable and you can throw in some zero days for some good ol’ R&R. Give it a light planning because your plans will most likely change. We left our planning pretty open but knew we needed to hit marks to either meet up with friends who were coming along for a portion of the trail or to make it to our resupplies, so our planning for mileage was done a day or two before each day. Our miles were averaging around ten miles per day. Some days were shorter being 7 or even 4 miles… which feels very odd when you have so much in front of you. Some days were 12-16 miles and our longest being 20+ miles from below Rae Lakes out to our resupply point in Independence, CA. I saw a lot of people taking their time and stopping along the trail to relax and enjoy it. I can’t stress that importance enough when planning this. It is an amazing trail and worth enjoying. I guess this is a good time to transition into the next portion of this article...tips for the trail.

Take your time and talk with people.
Hike with them as well. Get to know the crew of people around you on the trail. It is always great when you know your ‘neighbors’ on the trail. For the most, 99% of hikers are friendly beings and better yet everyone has a pretty interesting and unique story. You might be doing a lot of leap frogging with them when hiking. One great thing to come form socializing is finding out about spots along the trail you wouldn’t have seen or known about. I would have had no idea there was a hot spring at MTR, known about locating my last resupply, catching fish bear handed or other small tips or things to see on the trail if we hadn't talked to most people. Hiking with them just adds to your experience so link up with people if you find them moving at your pace.


Sleep at higher elevations.
Kerry, my good friend and hiking buddy slept at a lower elevation our first night. After we hiked up the next morning to our first pass (Donahue Pass, our permits were out of Tuolumne meadows) and saw the campsites at higher elevations and the awesome alpine lakes that surround most with amazing views, we decided from there on that we would sleep at higher elevations on the trail. This lead to several good and bad components, take them how you will. Sleeping higher resulted in quicker hikes over the pass in the morning, colder temperatures, no campfires, better alpine lakes, less people and amazing views of the surrounding mountains and night sky. Now I know I just talked about being friendly with your fellow hikers but I do enjoy the feeling of being along in the wilderness so sleeping close to the passes offered a bit more solitude than the lower elevations. I enjoy sleeping cold so the temperatures at night were perfect. I’m not a big campfire person, although I do love them, when I am hiking I tend not to make them. You will see on your map and signs posted when hiking past certain elevation points on the trail that campfires are not allowed beyond those elevations. The elevation for fires ranged from 8,500ft-10,000ft depending on which park or forest you are in. We did sleep at some lower elevations and had a fire to dry out cloths when we got to Grouse Meadow in Kings Canyon in a established fire pit, it was very nice. If you do have fires be respectful of those fire pits and if you see them in illegal spots help out the rangers and dismantle them. The views are simply amazing up higher and the night sky in the Sierra’s will blow your mind! There are many options for sleeping at higher elevations and a lot of really nice lakes to camp close to. I highly recommend taking the opportunity to sleep up high on this trail.


Bring a fishing rod, a Tenkara fly fishing rod to be exact.
I talked about this in my JMT Kit on The Outbound. It was one of my most favored pieces of gear besides the Peak Design Capture Pro Clip. I had so much fun walking the shores casting for the many species of trout on the trail. I took a Patagonia Tenkara 10’6” rod and their flies with me and was really impressed with the setup. I had never used a Tenkara style fly rod before so it took some getting used to but man, it was light weight, packed down to nothing and 100% pure joy. My top three spots for fishing on the trail are these: Lake Marie at the inlet to the lake coming from the pass. You will want to be right where the stream comes down the hill and flows into the lake. Right in those sections of rocks was a honey hole full of 12in brook trout. Biggest fish I saw on the trail. The second location was Grouse Meadow in Kings Canyon pulling out small golden trout but there were so many of them. You will see about a mile before you turn left for the Golden Staircase there will be some campsites right along the trail. You will notice the river to your right with a big rock in the bend of the river. Thats the spot. And the last favored spot on the JMT for fishing was Lake Marjorie before Pinchot Pass. We walked about two minutes down the lake once we hiked up to it and pulled right off the trail. This lake was full of golden trout, small guys but in the hour and half I was fishing here I pulled out 34 fish. Definitely take a rod if you like fishing, you will not be disappointed! Also fish will change locations so you might have to do some hunting but thats what fishing is all about.


Speak your mind.
This might sound obvious but I won’t lie sometimes that doesn’t happen. Kerry and I had a couple rough mornings because we weren’t speaking our mind and once we did we were back to having a great time. I won’t get into it but make sure you can be open and honest with your hiking buddy. It just makes everything a lot smoother.

Go with your gut instinct.
This is a great one to listen to because it usually is correct. No more needed.

Do laundry and a shower all in one go.
Enough said.

Try to catch fish bare handed.
At the bridge over the outlet of Garnet Lake just after 1,000 Island lakes we saw a couple people splashing around in the rocks below. We asked what they were doing and they said that you could catch fish with your bare hands since the water was low. We were all about it and threw our packs down and starting hunting. The fish think they are hidden once they put their heads under a rock so their body sticks out a bit. We were able to grab a couple. It was a fun way to break up the morning and an even better challenge.

Drink lots of water.
This might sound super obvious but sometimes I even forget to keep myself hydrated. There is an abundance of water along the trail and the Sierras at higher elevations will dehydrate you really quickly while you're hiking without you realizing from the evaporation. Since it is always around, stop often to fill up and chug away. Also, we pumped our water before bed as well so we were that much more ready to go in the morning. And lastly, don’t pump water down stream from river crossing, especially when horses are passing threw because they will shit in the water.


Go a bit farther to find a campsite.
We found that some of our best spots on the trail were when we hiked a bit farther to find them. Whether that was 5-10 minutes more or putting in a couple extra hours at the end of the day. One spot that comes to mind is at Thousand Island Lakes. For some reason I was exhausted this day and when we got to the lake all the spots close to the JMT were taken so we opted to hike down the lake for a mile or so and ended up finding a great spot with no one around. It was definitely nice since this is a sought-after location to camp.

Nothing is really a mile/mile and a half.
Don’t listen to that when people say this to you, which you will hear often. If you really want to know how much longer reference your map. Or just put the thought out of your mind and keep hiking on. That is all you have to do.
If you feel like your off the trail, stop because you are.
The trail is clear on the JMT with so much foot traffic over the years so it is very obvious which way is correct. We walked down a section that must have fooled a lot of other people from the outlet of Garnet Lake and quickly knew it was not correct. Other than that one section we knew where the trail was as will you.


When you're mad and cold, stop, layer up and eat something.
Like the Snickers slogan “Hungry, why wait?” There’s no reason not to stop and replenish your body. If you notice your mood change, do yourself a favor and stop to recharge before you do something stupid, like stomp on your tent and break a pole… Don’t ask.

Watch for wildlife.
There will be a lot of wildlife along the trail. Bears are out here, only Black Bears but yes they will come into your camp and try to steal your food if you leave it out. We heard a good horror story form a hiker. You will here them as well. Keep your camp clean and bear bins locked if you will not be using them. We had a bear encounter - well, two in one day - but the second was hiding and staring at Kerry. The first encounter we had was when we were walking down the trail into LeConte Canyon in Kings Canyon to Grouse Meadow. We turned the corner after passing a stream and all of a sudden 50ft from us was a bear walking up the trail. Bears walk on the trail because it is the path of least resistance. We stopped with no place to go but only 2 feet off the trail. We made ourselves known calmly and he simply noticed us and walked 15ft up the hill right past us, got back on the trail and went on his way. It was the best bear encounter to have. The second encounter was that same day but a couple hikers passed by mentioning the they saw a bear staring at Kerry in Grouse Meadow while she was tending her fire. He probably just wanted to be friends. Other than that we saw lots of mule deer and as we closed in on Whitney the marmot population grew like crazy. These marmots are extremely smart and do know how to steal your food. Make sure to keep your food in your bear bin around them, they understand the zipper and can easily squeeze into your pack without you knowing.

Know whats ahead and plan your day accordingly.
We hit the Golden Staircase all wrong. It is a big push up to Palisades Lake and Mather Pass. We left Grouse Meadow a bit late and ended up starting up the staircase around 1pm… the hottest time of day. It was not enjoyable but the swim in the lakes was. Definitely look ahead the night before and scope out what areas you want to hit at specific times.

Know how to back flush your filter.
It's a strange thing because the lakes are so clear but multiple filters clogged on us. Back flush your filter after every couple of uses. It will save time and headaches later down the road. Also be sure to clear them so they do not have water in them, especially at night time when it drops down below freezing. They will freeze at night and break. Same goes if your using a Camelbak with a hose. Push the water back into the reservoir to keep your hose from freezing up. Its not fun to stick a cold hose down your pants to get it to unfreeze.

Sleep with batteries and things that can’t freeze in your sleeping bag.
Like the filter, if it is still wet at night, throw it at the bottom of your sleeping bag to keep it from freezing. This goes for the gas canisters too. If they get cold they do not push out the same volume of gas. Sleep with them in your sleeping bag as well if it is going to be a particularly cold night. Camera batteries will loose their charge in cold conditions so remember to put them in your bag. This was every night with me. Kinda annoying but thats the only option if you want to shoot.
The trail provides.
Keep these three words in your head while hiking. If the shit really hits the fan, you will be surprised at how well those three words work.

Watch for weather.
Again, pretty standard when hiking but in the Sierra’s the weather can change rapidly. We were hiking over Silver Pass during a thunderstorm. We saw is brewing and made the decision but we were hauling ass over that pass as it moved in on us. Just keep an eye out for weather changing or ask people along the trail if they know about any upcoming weather and you’ll be all good.


Please help keep the parks and forests clean of trash.
Do your part in picking up after yourself and go further by collecting as much trash as you can find. Practice proper Leave No Trace ethics and help make a better experience for the next people behind you!

The very last thing I have to offer for planning your hike is to simply make sure you have fun. Thats what this is all about, getting out there and enjoying new experiences in new places. If you're not having fun then you're doing something wrong and that sucks for everyone. Find a way to change it and get back to enjoying it. But I think the most of you know this!
The John Muir Trail is simply amazing and I hope this information from my experiences helps you out that much more in planning your trip! All the best to you on the JMT!


We want to acknowledge and thank the past, present, and future generations of all Native Nations and Indigenous Peoples whose ancestral lands we travel, explore, and play on. Always practice Leave No Trace ethics on your adventures and follow local regulations. Please explore responsibly!
Do you love the outdoors?
Yep, us too. That's why we send you the best local adventures, stories, and expert advice, right to your inbox.


