Photographing the Milky Way, a Very Basic How-To
Figuring out how to take photos of the stars was super easy & very rewarding!

I've been wondering how to take photos of the stars for ages. Scrolling through my Instagram (which is 90% travel photographers), I consistently see incredible photos of some amazing view -but often it's at night, and the backdrop is the Milky Way in perfect definition.
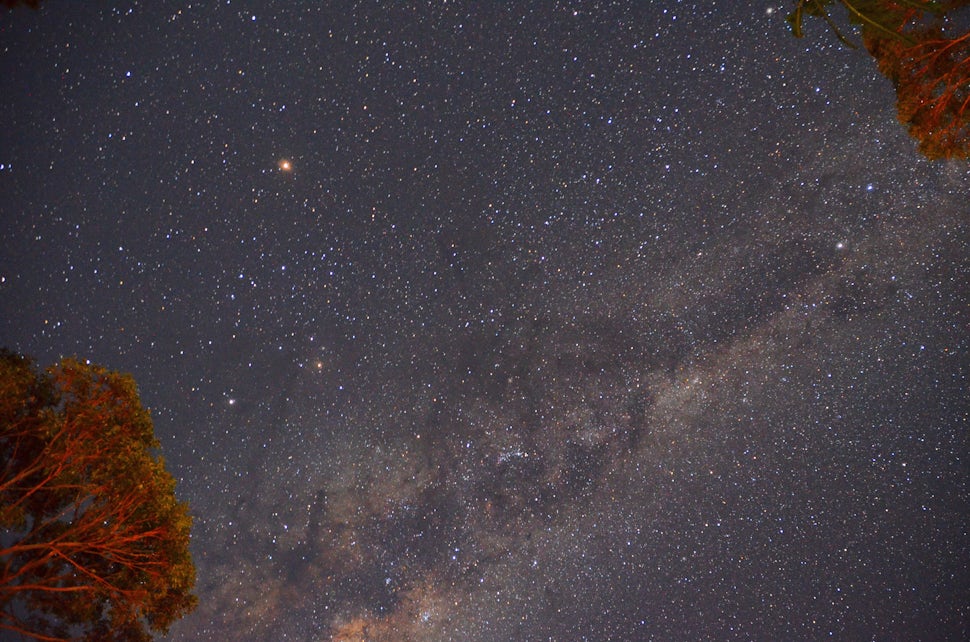
After a good hour and many screenshots of How-To's, blog posts and photographer sites, I thought I had a general grasp on how to do it. Coincidentally, there was a meteor shower the night I got up at 4am to take photos, and although I wasn't able to leave my balcony or actually capture a good photo of a shooting star, I thought I did pretty well for my first go. However there is definitely some light pollution and a whole lot of blurring (there was wind, ok?!) - but you can see a tiny shooting star in the top right, just above what I think is Ptolemy's Cluster (M7).

But my efforts weren't without failures. I went camping the next night, and my camera was left turned on and ran out of battery. Though I was disappointed, the night was still amazing as we slept under the stars and saw about 20 shooting stars as we went to sleep.
My second efforts a week or so later were a bit better, even though I didn't use a tripod - I just set the camera on the concrete and propped it up slightly with my phone. Who even needs all those gadgets? (Me)

Mars is the really bright, orange dot just above and to the left of the middle.

I think my face accidentally bent over the camera too far, and that's the blurry shape on the left! So though these aren't the most amazing photos at the highest quality (and none of them have beautiful mountains in the foreground), I can always improve.
So how did I do it?
[warning, this is the Most Basic Guide ever]
- Camera used was a Nikon D5100 with a Tamron Piezo Drive 18 - 270mm lens
- I put the camera on a hard surface (tripod would probably be good here) and a 10 second self timer (so my finger pressing the shutter wouldn't bump the lens)
- A blog post said something about locking the mirror up so its' opening and closing didn't cause blurring but I didn't fully understand that, so that's something to research for next time
- Manual focus was set to infinity - but warning, remember to take it off manual focus if you're going to give the camera to your mum the next day to take photos of the family
- Settings - I put it on Manual mode (the M symbol), which allowed me to change both the aperture and shutter speed
- The aperture divided by focal length (the f-stop) was 3.5 (the lowest the camera could go) and the shutter speed at 30 seconds (the longest it could go without going to Bulb mode, where I'd need a remote or need to manually hold down the button for as long as I wanted the photo to be)
- ISO was on automatic, because I didn't really know what to do there
The whole experience actually made me slightly sad that my eyes can't see the stars that well - and that only 1/3 of the world's population can see the Milky Way. And I'm always amazed by the fact that the light we're seeing has traveled from a million or a billion or a trillion kilometers away, so we're really looking into the past. When we see the light from a star, we could be looking at a star that's now dead, or light that started its journey towards earth as early as the Big Bang.
So.. any tips? Experiences with trying to take photos of the stars? Ways to get around buying a remote?! Leave a comment....
- Queenie :)
instagram.com/queentki
We want to acknowledge and thank the past, present, and future generations of all Native Nations and Indigenous Peoples whose ancestral lands we travel, explore, and play on. Always practice Leave No Trace ethics on your adventures and follow local regulations. Please explore responsibly!
Do you love the outdoors?
Yep, us too. That's why we send you the best local adventures, stories, and expert advice, right to your inbox.


