
Lofoten Winter Magic: Photography Essentials for Capturing the Arctic Wonderland
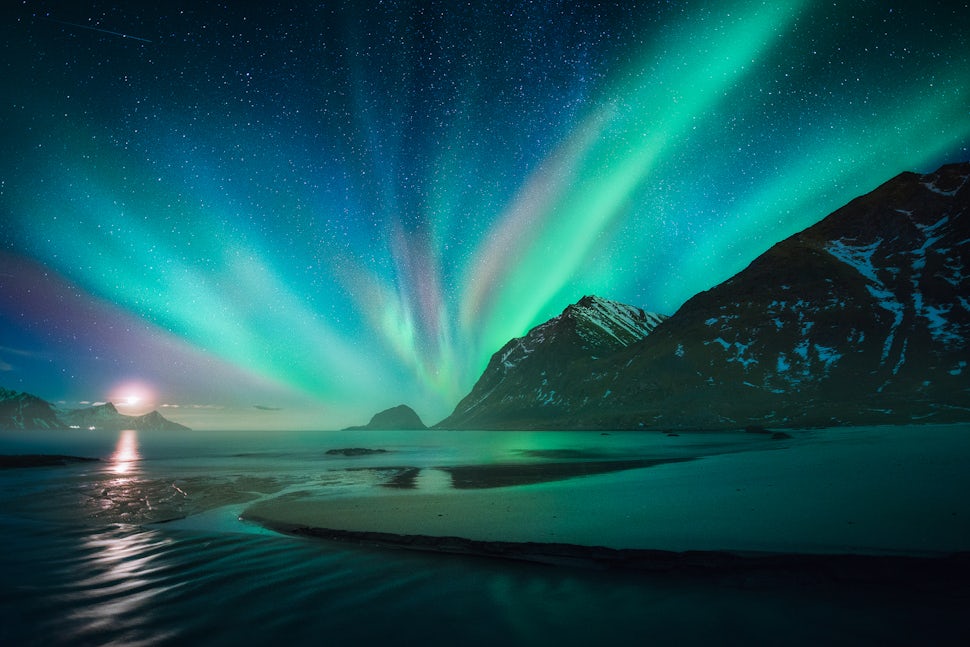
The Lofoten archipelago is undoubtedly one of the most beautiful places on earth! While summer attracts outdoor enthusiasts and photographers alike, winter transforms this Arctic wonderland into a fairytale. November to February will greet you with magical light, majestic fjords…and marvelous Aurora!

However, winter also presents a set of challenges. One, without the right photography gear, you wouldn’t be able to capture the best of Lofoten. It is crucial to carry the appropriate lenses, filters, and tripod. Two, a set of perils could potentially turn your Arctic adventure into a disaster. Tripod-testing winds, icy conditions, and deceiving tides are prevailing elements. I was fortunate to conclude one of the best weeks of my life in this remote part of Norway this season with just a minor cut on my palm!
What should my camera backpack contain?
Camera Body
- A full frame DSLR: You need a camera with good noise performance at high ISO ranges 1600-3200. You could still carry a cropped-sensor camera but you will have noticeable noise in your Aurora shots and won’t be able to make the best use of a wide-angle lens. (I had my D810.)
- 2nd Camera Body: Although not necessary, an extra camera body would make life easier. If I know I will need the services of at least two lenses in one session, I prefer having a second body. That way, I wouldn’t risk damaging or dirtying the camera sensor when changing lenses in the extreme conditions. You can always rent a body from camera rentals.

Lenses
- Wideangle: The bread-and-butter 14-24mm for Nikon users and the 11-24mm for Canon users are absolutely essential. They will capture Aurora nights and accentuate Arctic foregrounds wonderfully. If you don’t own either, then consider renting one with a 14mm focal length for your camera. I used mine 90% of the time.
- Mid-range zoom: Lofoten is decorated with small islands with colorful cabins that contrast nicely with the fjords. At times, filling the frame with the help of a 24-100mm ranged lens can create pleasing imagery. The 24-70mm was key to capturing a magical sunrise of Reine.
- Telephoto: You don’t really need a telephoto lens. If you do pack one, maybe you will use it for a couple of shots (minimalist peak or singular island compositions). For only essentials, I wouldn’t recommend one (especially for their size and weight).

Tripod
- Legs: Firstly, you want legs than can withstand strong winds and sea-conditions at awkward angles. The feet should be able to grip on ice and stand stable on bouncy tundra slopes. Secondly, legs that can enable very low angle shooting will aid in getting unique perspectives. Tripods without a central column would be better. Thirdly, I find twist-type section locks to be a hassle as sand and salt can make the locks frustrating to operate. I’ve also found myself tightening the twists several times mid-shoot. Flip-locks might be better in this regard. Overall, mountain-grade tripods from brands like RRS, Gitzo, and Manfrotto would do the job.
- Ballhead: Your ball head should be able to handle the payload of your camera and your heaviest lens easily with room to spare. A good test is to fix your tripod at a downward tilt and push the ball head downward at an angle with your gear. Give the setup a gentle tap to see if it stays stable. Additionally, ball heads with lever-release clamps are preferable.
- Mount plate: Do yourself a favor and get an L-plate. You will have so much more flexibility with vertical shots!
- Travel tripods: You could take a chance and carry a lightweight (but strong) tripod system like the Gitzo GT1545T with an RRS BH-30 ball head (my go-to setup). But, it is going to take a lot more effort to find a stable position in difficult conditions. Furthermore, gusts of wind and waves will challenge your expensive equipment during long exposures.
Filters
- Graduated Neutral Density (GND) | Soft Edge | 4-stop: Some of my favorite shots from Lofoten were of silky wave motion captured at the beach. To get these longer exposures, you need to compensate for an overexposed sky. Here’s where using a GND filter will get you a great sky and wave motion in a single shot. If you want, you can also opt for a higher-stop GND.
- Polarizer: Lofoten waters are gorgeous! The blue-green waters of the fjords make for striking foregrounds. They also contain a lot of detail below the surface. However, the light reflecting off it can shield those underwater details from your sensor…unless you use a polarizer to get the amazing details! Furthermore, pairing a GND with a polarizer could give you unbelievable exposures in applicable scenarios (such as dramatic skies over clear lagoons).

Miscellaneous
- Batteries: A typical shooting session in Lofoten can drain 50% of your battery. At night, it can be up to 80%! Remember, the cold drains batteries faster. If you can charge your batteries every day, then one fully-charged spare battery for two cameras should be fine. Between my two D810’s, I had three batteries. Lastly, if you can keep your batteries insulated from the cold, you will palliate the drainage.
- Microfiber wipes: Sea and snow – you will be at or around them throughout. One evening, I was exposing a seascape when suddenly, I got splashed by a wave. Though I could elevate my camera at the last moment, it took some water. Fortunately, I had a microfiber wipe to clean and dry it immediately. Moreover, it’s always handy to keep one at hand because sometimes you don’t notice obstructions on your lens until you review your shots.
- Screw Keys: Imagine you have found an excellent composition by the rocks. The streaks of Aurora start glowing brighter. You start setting up but one of the tripod legs decides to get drunk. The screw has come loose! Yes, that was my situation. Fortunately, my buddy had a key meant for tightening such screws. Phew! So yes, make sure you have the keys you might need to tighten the screws holding your tripod and the plate under your camera. PS: during flights, it’s safer to store them in your check-in luggage as some scans might disallow them in your carry on.
- Crampons: Although not camera gear, trust me when I say they will make your photography journey much easier – and safer! Getting to the best photo-spots will require negotiating slippery/icy terrain. I felt almost invincible with my crampons! Even better was that those pair of crampons could also go over my water overshoes. Make sure you have crampons that can fit both – your regular outdoor shoes and your overshoes.
- Liner gloves: Again, this is not camera gear but the pair I bought from Under Armour became an integral part of shooting. In fact, I barely used my bigger gloves. Despite being thin, the liner gloves kept my hands warm in below-freezing temperatures. I could operate my camera easily without having to take them off. This was a God-sent bonus! Furthermore, they were e-tip (touchscreen friendly), which meant I could update my social media without exposing my fingers. Just one caveat: don’t get them wet!

What/when am I shooting?
Although you could be shooting all day, here are a few things to keep in mind:
- The Light: Daylight is only for a few hours during the winter. I went toward the end of January when sunrise was around 10 am and sunset was around 2 pm. (Need not wake up early!) The sun rolls across the horizon, casting beautiful light through the “day.” The extended periods of magical light present a rare opportunity to take sunrise shots at more than one location!
- The Aurora: Aurora forecasts are a good indicator of general activity by the hour. However, they are not completely accurate. One of my favorite Aurora experiences was at a time when the prediction wasn’t great. You could get sudden spikes that last a few minutes. So, it’s always worth going out and staying alert.
- The Tide: The tide can dictate what kind of photos you take. In Lofoten, high tide and low tide at the fjords alter the way landscapes look. While high tide can help with reflections and long exposures, low tide creates and reveals interesting formations such as “ice flowers.”

I can divide the photography “moods” of Lofoten into three flavors:
- Blue Hour: Blue hour is a very moody time of the day where artificial light is in harmony with natural light. It is still dark enough to make long exposures but just bright enough to see your surroundings clearly. The colorful cabins and cottages of Lofoten create beautiful imagery against the “blue” fjords during this period. The yellow light from the houses, boats, and lamps adds a punch to these shots! 90 minutes before sunrise is a great time to capture Lofoten dreaming! Moreover, overcast conditions are not a problem!
- Sunrise/Sunset: Usually, the best light of the morning lasts for only a few minutes. You need to decide on one spot and stay alert. But, this is Lofoten winter! You are in an Arctic wonderland! The magical light lasts for a better part of an hour and you have the freedom of capturing it at more than one spot! It’s still better to arrive earlier and scout out your foregrounds. The (frozen) lakes and fjords are decorated with unique ice features. You will also notice that the morning presents striking reflections. For sunset, consider exploring the coasts. You can get lit peaks or dramatic seascapes. A GND filter could be quite useful with the setting sun.
- Aurora Borealis: Ah yes…the ever-enchanting Northern Lights! You can be out between 8PM to 3AM hunting the Aurora. However, to make the hunt more focused and efficient, you should check the Aurora forecast (along with the weather, of course). Websites like aurora-service.eu give hourly forecasts of the Aurora. A higher “Kp” value would correlate to higher Aurora activity. If it’s a reading of three or more, drop everything and head to a location! That being said, you are not guaranteed an “Aurora Dance” with high Kp values. On the other hand, you could witness a brief spike with lower Kp values as well. Just enjoy the night and hope for a spectacle! Even with partial clouds, you could be in for a magical night – which was the case with me in Reine.

Hopefully, I have been able to provide useful insights into having the tools to make epic images in an epic region! While a picture may be worth a thousand words, your memories are so important! Yes, do your best to capture the magic but also take a step back from your camera and just take it all in!

We want to acknowledge and thank the past, present, and future generations of all Native Nations and Indigenous Peoples whose ancestral lands we travel, explore, and play on. Always practice Leave No Trace ethics on your adventures and follow local regulations. Please explore responsibly!
Do you love the outdoors?
Yep, us too. That's why we send you the best local adventures, stories, and expert advice, right to your inbox.


