
A Beginner's Guide to Packrafting
For most of us outdoor types, we live in a perpetual need to make everyday wild in some small way. But when it is time for something epic and memorable, you'll want to try packrafting.
There is no better feeling than summiting a mountain or propelling yourself through a wide body of water. It's almost therapeutic. The crunching sound of a foot landing on the earth. The light drip of water from a paddle’s blade as it skims the surface. Add the singular focus of moving towards a destination, it's almost meditative.
Until recently, I thought hiking or kayaking were mutually exclusive. That is until I discovered packrafting.
Perhaps the idea of a packraft is foreign. So in the simplest of terms, it can be described as an inflatable boat, light enough to carry, that one hikes with for as long as they desire over any type of terrain. Then, once a river or lake or ocean is put in your path - you inflate the boat and get on the water.
Although lightweight portable boats have been used for a number of years, it wasn’t until a surplus of inflatable boats from WWII, used as survival gear in war planes, made its way to intrepid adventurers in the 1950s that packrafting really came to be.
The pioneers of the sport brought the army boats down rapids in the Grand Canyon early on, and the will to explore more serene places with a boat you can carry over mountain passes to harder to reach water sources grew.
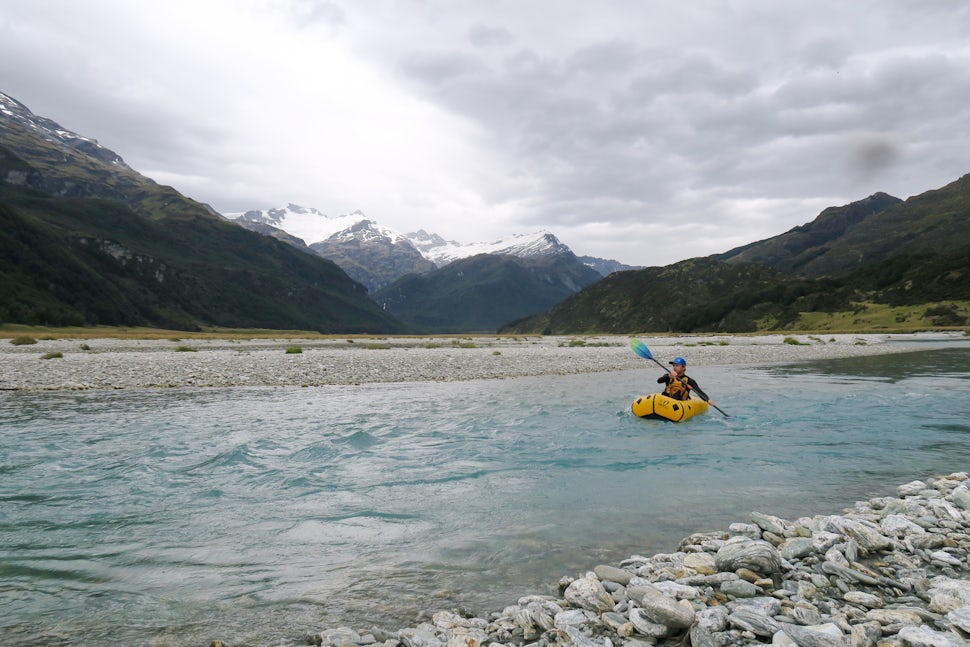
My introduction to packrafting came in New Zealand’s South Island. Plodding along the trail beneath a thick canopy of rainforest, I fell in love with the sport instantly. Surrounded by the murmuring of running water from a nearby river, and the chorus of birds that call the wilderness home, well, that just sounds like bliss to me.
New Zealand was a perfect destination to try out packrafting. With countless crystal clear rivers to access, most with easy well-maintained trails following these rivers, our hardest decision was which river to pick.
For the beginner, here are some simple tips to get you started in packrafting.

1. Pick a lightweight boat.
Size matters in this sport. If you are going to be carrying your raft on your back for hours at a time, make sure you have something you can manage. Rafts can weigh as little as 1.5kg and upwards of an amount you wouldn’t want to carry.
Just as each river or body of water is different, so are the boats. First off, decide what kind of trip you are doing. Long walks - probably don’t want too heavy of a boat. Big rapids - make sure you get one with a built in spray deck and a corresponding spray skirt. Tons of gear - ensure the boat is big enough.
Do your research and get a packraft that matches your style of trips.

2. Choose your water wisely.
Not skilled at whitewater? Maybe stick to the Class I rapids or lakes at first to get confidence in your paddling abilities.
Ideally, before a large trip take a few trial trips to test the waters. Pick a river that is nearby an easy trail system that allows for about two hours of hiking beforehand so you know if you can withstand the weight of your pack. Rivers are classed I-VI and if you are beginner, don’t go above class I or II to start. Rivers have currents and eddies that should be understood and respected. While the packraft feels incredibly stable and makes even novice rafters feel confident in their paddling skills, it is best to play it safe in the early stages.

3. Bring the right extra gear.
Safety first. First and foremost, wear a lifejacket. If you are trying out whitewater, bring the same gear you would for a whitewater kayak (ropes, helmet, spray skirts, wetsuits, etc).
Quality paddles that are lightweight will definitely be appreciated for the longer paddle stretch and for not adding much weight to your bag.
Since packrafting is essentially hiking and rafting, make sure to bring hiking boots you’re comfortable in. Keep in mind that due to trails often being near a water source, they can be prone to mud. Any extra shoes or gear can go into dry cargo areas or dry bags attached to the boat.
As with any backcountry explorations, a paper map, GPS, along with a communication device are also key. Always let someone know your plans of where you are going and an estimated check in time for when you’ll return as well, just in case.
Food and camping gear you can carry are also essential if you are planning for an overnight trip.
For us, a waterproof camera to catch all the action is also a must. But above all, bring the right attitude and enjoy your paddle.
--
Follow along my adventures in real time : @meandertheworld.
We want to acknowledge and thank the past, present, and future generations of all Native Nations and Indigenous Peoples whose ancestral lands we travel, explore, and play on. Always practice Leave No Trace ethics on your adventures and follow local regulations. Please explore responsibly!
Do you love the outdoors?
Yep, us too. That's why we send you the best local adventures, stories, and expert advice, right to your inbox.


