
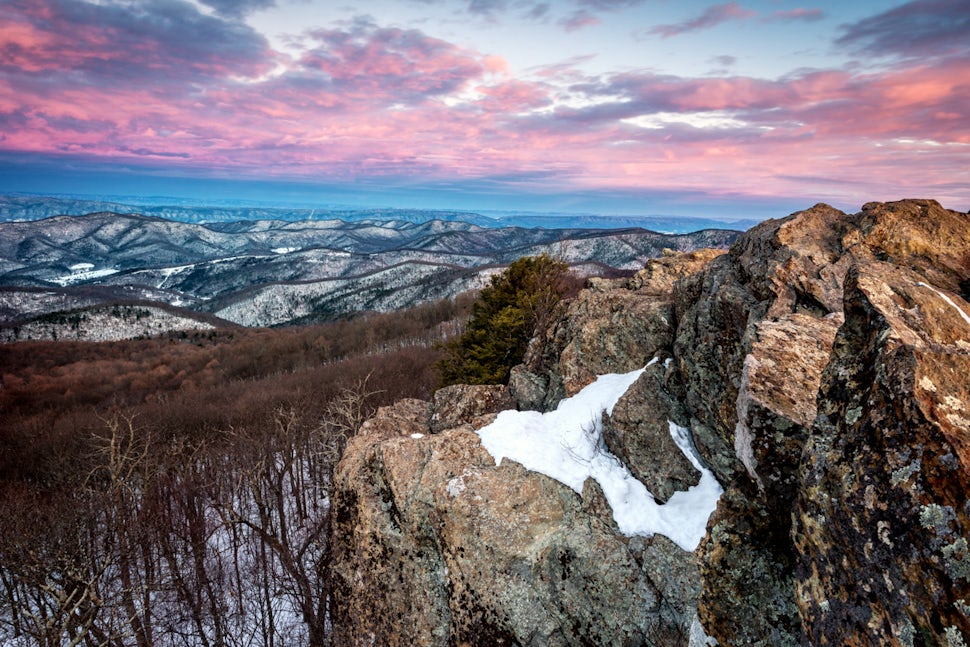
7 Essential Winter Landscape Photography Tips
Essential winter landscape photography tips to take your winter landscape images to the next level and to make you a better landscape photographer.
1. Timing
Like most other aspects of landscape photography, timing is everything when photographing winter landscape. As a landscape photographer, sometimes I feel like I have become a meteorologist because I am always watching the weather to try and predict the best conditions to photograph a location. For winter landscapes, usually the best conditions are just after a snowfall. Winter landscapes typically look their best after that fresh blanket of snow covers the scenery. Photographing during a snow storm can be difficult because snowflakes will land on the front of your lens, creating water spots. If you are photographing while it is snowing, make sure you have a microfiber cloth with you to remove all of the snowflakes and water drops from your lens. Also, weather during the winter can quickly change, so make sure you check it again right before you leave for safety reasons and to make sure the conditions are what you are hoping to photograph.

2. Over Expose Your Image
Photographing snow and ice can be very tricky because all of the white tones your camera views as you photograph the snowy landscape. Without getting into too many technical details, your camera wants to make everything 18% gray. It will see all of that amazing white and bright snow and will under expose the image, resulting in gray snow and ice in your image. To help prevent gray snow and ice, you will have to take control of your camera and overexpose your image by 1-2 stops of light, which will allow you to capture the proper white tones. Make sure you look at your histogram because you want to make sure you capture all of the details in the snow and ice. If you have a spike along the right edge of your histogram, then lower the exposure until your histogram is as far to the right as possible without any spikes along the edge. Doing this will help you capture white snow and ice.

3. Think before You Walk
Pristine snow can really help set the mood of isolation and foot prints in the snow, especially if there are a lot, can spoil this feeling, so think ahead about the composition you would like to capture before walking all over the place. To help prevent this, I work wide to small. When I first arrive at a location and am looking for a composition, I first stop and think about what elements drew me to this location and where do I need to be to best capture these elements. As I move around looking for the best composition, I slowly walk in a wide arch trying to disturb as little snow as possible and making sure I do not disturb any snow in the area I want to photograph. Once I’ve captured my wide angle image(s) I slowing move in, still walking in a wide arch, looking for other winter landscape compositions and detail images to capture.

4. Details
While capturing the grand winter landscape is a lot of fun, to help tell the whole story, remember to capture the detail images as well. Look for interesting subjects that will add to the story of the day’s adventure. Details can be anything including snow on tree branches, pinecones, or icicles on rocks. Usually when I am photographing detail images, I will use a large aperture (f/2.8 – 4), which will help blur the background making the subject stand out. And if you are lucky a cardinal will land on the brach you are photographing.

5. Polarizer Filter
A circular polarizer (CP) filter is an essential tool to have in your camera bag year around, but it is very helpful when photographing winter landscapes. Most beginner landscape photographers use a circular polarizer (CP) filter only to enhance the color of the sky, but it can also be used to darken the sky and can remove the glare from the snow. Darkening the sky while removing the glare of the surface of the snow can help add some much needed contrast to your images, especially if you are thinking about converting the final image into black and white. If you want to capture the snow and ice around waterfalls, most CP filters also block 1-2 stops of light, which will slow the shutter speed allowing you to create the smooth water effect.

6. Dress for Success
Staying warm and dry are very important because the truth is that landscape photographers sit around a location for hours waiting for the perfect light. If you are cold or wet, it may force you to leave early, which could lead to you miss a beautiful sunrise or sunset. Dressing in layers is very important especially if you have to hike to a location, and never wear cotton as a base layer. In fact, you should just leave your cotton clothes at home. A rule I was taught in the military while going though survivor training was to stay comfortably cool while hiking. This will help keep you from sweating, which in turn will help keep you dry. Once you get to your location, you can start adding layers back as your body cools down from the hike. If you are not comfortable, you will become miserable, and you will not enjoy the experience of being out photographing winter landscapes; besides being miserable, being cold and wet could lead to more serious issues like hyperthermia, so please dress appropriately.
Also, batteries and the cold do not mix very well, which means your camera battery will not last as long as normal. If you have a spare battery, bring it with you and keep it in an inside pocket, close to your body to keep it warm. If your camera battery does die, usually if you warm it back up, you are able to get a few more pictures out of it. Another trick is to put your battery next to your hand warmer, which allows you to stay warm while keeping your battery ready to go.

7. Protect Your Gear
After you are done getting amazing winter landscapes, DO NOT bring your camera and glass (lens) back into a warm room or vehicle, this can cause condensation to form on or inside your camera and glass. When traveling home, do not blast your heater as soon as you get into the vehicle, but instead, slowly raise the temperature as this will help prevent condensation from forming. If you must blast your heater as soon as you get into your vehicle or are heading directly into a warm room, put your camera and glass into a zip lock bag or dry bag beforehand. This way, any condensation that forms will be on the outside of the bag and not on or in your gear.

To keep building your photography knowledge and to keep from repeating the same tips over and over again, I also recommend you quickly read 7 Essential Landscape Photography Tips and 7 Essential Landscape Photography Composition Techniques. Both are full of great tips that will help take your photography to the next level, and both articles will also help you improve your winter landscape photographs.
We want to acknowledge and thank the past, present, and future generations of all Native Nations and Indigenous Peoples whose ancestral lands we travel, explore, and play on. Always practice Leave No Trace ethics on your adventures and follow local regulations. Please explore responsibly!
Do you love the outdoors?
Yep, us too. That's why we send you the best local adventures, stories, and expert advice, right to your inbox.


